
_edited.png)
Confessions of a Serial RV Renovator (aka: How to DIY Your Camper Without Crying…Too Much)
- rain2shineventures

- Aug 1, 2025
- 9 min read
Updated: Aug 5, 2025
Let’s get one thing straight: I LOVE what I do--I’ve renovated-17-campers-in-four-years kind of love. Like, sprinkle-sawdust-in-my-coffee kind of love. But let’s not pretend this life is all fairy lights and throw pillows. So buckle up, buttercup—these are the confessions of a serial RV Renovator and let me tell you, my friends: it’s a beautiful, chaotic, dust-covered ride through madness, and I’m here to warn you before you grab a sander and/or lose your sanity.
So, here it is: the brutally honest, occasionally hilarious (usually in hindsight) reality of DIYing your own RV - aka the glam-free version nobody on Instagram talks about.
Spoiler alert: it’s not for the faint of heart… or weak of forearm.

...but really, I literally go to the gym five days a week just so I can do my job.
Step 1: Sanding aka “The Torture Begins In Your DIY RV Renovation”
You’re thinking, “How hard can sanding be?” Bless your sweet, naive heart (as we say in the south).
After eight straight hours of sanding RV walls, ceilings and cabinets, your arms will feel like cooked noodles, your palms will have their own pounding heartbeat and you’ll look like a powdered donut from all the sawdust covering you. Your back will beg for mercy. Your face mask will leave marks as you peel it away from your sweaty cheeks…leaving you to wonder how it was even possible to get sawdust in your eyes. And, yes you will become one with your orbital sander while simultaneously questioning every life choice that brought you here. Not to mention, those (first) eight straight hours turn into days and days and days of sanding. Just when you think, “Surely that’s enough sanding,” the RV inevitably whispers, “You missed a spot.”
However torturous it may be, this imperative step will keep your paint from peeling or flaking for the rest of your travel days.


Step 2: Cleaning “Because What’s Better Than Sanding? Cleaning Up After Sanding... TWICE!”
Of course you should get a reward after days of sanding, right? Wrong! Now, it’s time to get all the sawdust out of your RV and then scrub every inch like your rig is about to be inspected by the Queen. TWICE!
Allow me to introduce you to TSP–it’s what you use when soap isn’t emotionally strong enough for the things your walls have seen. Then, water, gloves and your trusty sponge, aka your new best friends/enemies put the TSP in action. It's like washing a tiny, oddly-shaped elephant that sheds dust, chemicals and judgment. If you’re not slightly dead inside by the end of this, you should ask yourself if you even cleaned it properly?

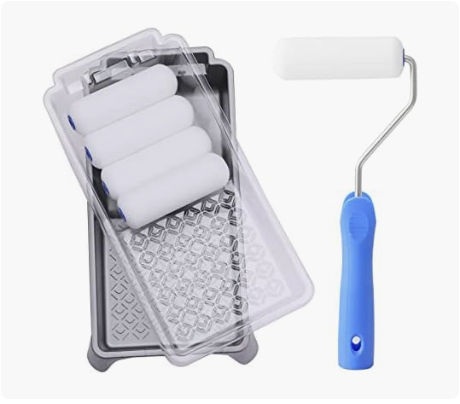
Step 3: Paint Prep aka “The Taping-and-Re-Taping Olympics”
Who remembers the movie, Groundhog Day where the same day is re-lived over and over? Well, paint prep in a camper is basically a masterclass in déjà vu. First, you spend three hours taping off every window, cabinet, vent, and the who-knows-what button just to paint the walls. Victory! SYKE! As soon as you finish that, you turn around to realize now you have to tape off those freshly painted walls to paint the cabinets. All the while wondering how such a small space requires so much tape.
It’s a never-ending cycle of tape, paint, peel, repeat—like a time loop designed by an extremely passive aggressive roommate.

Step 4: Priming & Painting aka “A Love Story That Starts Like a Rom-Com but Ends Like A True Crime Podcast
Ah, painting. The sweet illusion of a fresh start. A blank canvas. In fact, depending on how delusional you are, you may even feel like Michelangelo for a solid 48 hours.
Finding a surge of purpose, you add COLOR! CHARACTER! VIBES! But then, day 5 rolls around and you’re whisper-screaming “WHY are there still 26 cabinet doors?!” to no one because no one else is crazy enough to do this without getting paid.
The thrill fades fast. Your knees hurt. Your roller and/or sprayer is betraying you. And somehow there’s paint in your ear. If you don’t have a magical paint booth (aka a garage not already full of tools, junk, or your emotional baggage), just accept that your entire space will look like an art school exploded for a while. You’ll be eating dinner next to drying drawer fronts. Romantic, right?


Step 5: Flooring: “A Groundbreaking Battle”
The good news is flooring feels easier, but unfortunately, the bad news is it isn't. You'll think you're flying through it until you hit an awkward corner because RVs are where 90 degree angles go to die. In fact, they're so rare you might as well be arguing with geometry when you’re 4 cocktails to the wind.
But, I digress. Compared to sanding and painting, flooring still feels like a vacation.


BUT WAIT! THERE'S MORE!
Now, we enter the INTERIOR DESIGN phase with a dash of emotional spiraling. This is when you think you're almost done...but, nope!
Tiling- If you thought "backsplash" would be a fun weekend project, then you've never had grout end up in places grout should never be. The wall gently bows like it's afraid of commitment, the countertop slants slightly downhill, and every “cut to fit” tile becomes a micro-masterpiece of frustration. And, that's just the beginning. Next is the grout, finding its way into every crack and crevice—some intentional, some not—while the clock ticks down before it hardens on the tile. It’s a rinse-and-repeat ritual: grout, wipe, curse, repeat. Your patience goes on strike and you begin to wonder how you could have ever thought this would a fun and easy weekend project. Oh, and don't even get me started on peel-and-stick backsplash.


Wallpaper- This is like wrestling bubble-ridden vinyl on a wall that isn't square or level. You quickly learn that it's called peel-and-stick because it's a vicious cycle of peeling, sticking, unsticking and re-peeling it...over and over and over again. The idea of wallpaper is great. It adds texture and design in your space but halfway through smoothing it into position with a credit card or squeegee (if you're really serious), you find a bubble somewhere between the 1st and 47th that you missed and you have to start to unstick it and start over. Eventually, you get enough done to step back and admire all your hard work just to realize the pattern doesn't fully match up and this misaligned nightmare will actually keep you from sleeping at all. This is not a nightmare, it is real life and Instagram lied to you--it is not "easy" and you are not as handy as you may have thought.


Lighting- ZAP! Shock yourself once and apparently, just like that, you're an electrician! Hopefully when it comes to RVs, there's a chance it was only 12V–but please make sure to unplug your camper before installing lighting–SERIOUSLY! But hey, once it’s glowing with prettier/updated fixtures, you’ll forget the dish of wire spaghetti, and the brief moment you wondered if 12V wiring was designed as a prank by electrical sadists.

New Faucets & Sinks- Sounds easy, right? I'd agree with you but I've been upside down in a cabinet the size of a shoebox trying to tighten a fitting that refuses to exist in this dimension. And, if that doesn't intimidate you, wait until it's time to "test" it and immediately regret everything. However, eventually the fitting tightens, the leaks stop, you dry off and the faucet shines! You will feel like a plumbing prodigy...at least until the next drip.

Epoxying The Shower- Fantasizing about a sleek, waterproof, high-end finish in your RV shower? No problem, all you need is a cocktail of two mysterious liquids, then set a timer, and it's a race against the clock while high on fumes and full of regret. The process is questionable and you'll quickly be on a rollercoaster of sticky gloves, internal screaming, and wondering if you’re about to epoxy yourself permanently to the shower floor. Gorgeous? Yes. Worth it? Also yes. But next time, I’m wearing a hazmat suit, emotional support goggles, and bathing in something far stronger than soap when it's all done.

New Countertops- Where your coffee cups and midnight snacks will thrive and shine bright. Sure, there’s some measuring (hopefully accurately) and maneuvering, but mostly it’s like playing a satisfying game of real-life Tetris. When that slab perfectly clicks into place, you’ll feel like a countertop hero. What's even better? It’s the kind of upgrade that makes your whole RV feel a little more grown-up—without losing its readiness for spontaneous road trip goodies.

Reinstalling Cabinet Doors and New Hardware- Reinstalling your freshly painted cabinet doors and drawers with shiny new hardware? It’s like accessorizing your RV with the perfect statement pieces—suddenly it feels stylish, intentional, and way more pulled-together than you ever thought it could. You’ll do a tiny happy dance to the music in your head (hopefully you no longer hear the hums of sanding) with every perfectly aligned hinge and every drawer that slides just right. Sure, a few screws might play hide-and-seek, and a couple of doors might have attitude issues, but once it’s done? You’ll be convinced you’re an interior design wizard.

Trim & Molding- Ah, trim—the finishing touch that should take an hour but ends up taking your soul...and your budget! You’ll measure 14 times and cut it wrong anyway. You’ll flip it, reverse it, stare at it like it personally betrayed you. Angles haunt your emotional wellbeing. Math becomes theoretical. And by the end, you’re muttering things like “caulk fixes everything” while convincing yourself that technically that gap gives it character. Trim isn’t just about clean lines—it’s about personal growth, humility, and learning to love your nail gun like a therapy pet. You could've never imagined how frustrating and expensive this step could be, but let me tell you--it elevates a space like nothing else.

Caulking– When it comes to caulking your RV, it's like that one friend who needs constant attention (and an entire paper towel roll). You carefully smooth the bead, step back feeling proud… then notice a tiny gap or bubble the next day. Cue the re-caulking. You’ll become a master of the caulk gun—always chasing the high of that perfect, waterproof seal. Unfortunately, it’s never truly perfect...but hey, at least you’re officially besties with silicone and anyone else that comments on the imperfections doesn't get to join the friend group.


Decorating– Ah, decorating—the moment all the time you've spent watching HGTV pays off and your RV really starts to feel like you. You’ll hunt down the perfect throw pillows, argue with yourself over wall art, and strategically place plants that may or may not survive life on the road. Warning: this stage involves a lot of “Does this actually match?” and “Maybe this could be cozier?” sprinkled with “Why did I buy 17 lamps?” But when it all comes together, and you finally sit back surrounded by your perfectly imperfect style, you’ll realize it was totally worth the chaos. Welcome home, adventurer—your tiny palace awaits.
If you need a little inspiration for your decor, check out our Amazon Storefront, showcasing decor from specific RV projects as well as some of our all-around favorite decorations and touches.

The Moral of the Story? You CAN Do This.
Is DIY camper renovation exhausting? Without a doubt. Is it worth it? 100%. Will you want to throw your sander off a cliff at some point? Probably.
What you thought could be a fun weekend project will turn into months (likely 3 to 6+) depending on how much time you spend on it.
Nonetheless, a DIY RV renovation is a wild ride full of sweat, tears, and TRIUMPH. You’ll discover muscles you didn’t know existed. Your hatred of sanding and painting will span lifetimes, but you’ll also stand back, look at your finished camper, and whisper: “I built this"...still in amazement. And, then immediately lie down for 12 hours.
But here’s the thing—I believe in you. You really can do anything you put your mind (and muscles, and occasional tears) to. Make sure you’ve got the right tools, a good playlist, a ton of snacks, and maybe, just maybe… my number. Renovating RVs for clients is what I do for a living, and if at any point your DIY dream starts to feel like a dusty nightmare with no end in sight—guess what? You know who to call--not Ghostbusters. Me.
Make sure to check out our list of ESSENTIAL TOOLS FOR YOUR DIY RENOVATION JOURNEY before you get started or our Amazon Storefront with links to all of our essential renovation tools.

If you made it this far, you must be seriously considering a DIY RV Renovation. So, GOOD LUCK! YOU GOT THIS!!!
...but call me if you don't.

Alice Zealy,
Owner of rain2shine ventures
RV Renovations
DIY RV renovation | RV remodel | RV renovation ideas | RV interior makeover | Camper remodel | RV renovation on a budget | RV transformation | Renovating an RV yourself | peel and stick wallpaper RV | RV cabinet painting | RV flooring upgrade | camper van makeover | budget RV upgrades | RV decor ideas | how to renovate an RV | updating RV interior | RV wall treatments | RV cabinet hardware upgrade | how to paint RV cabinets without sanding | easy DIY RV renovation ideas | best peel and stick wallpaper for RV walls | affordable RV makeover tips | before and after RV renovation photos | step-by-step RV remodel guide | renovating a travel trailer on a budget | small space storage hacks for RVs | RV kitchen remodel on a budget | modern RV interior design ideas | RV renovation for beginners | how to make an RV feel like home | Instagram-worthy RV makeover | RV DIY projects for weekends | stylish RV upgrades that don’t break the bank | what I wish I knew before renovating my RV | full-time RV living renovation tips
This article referenced chatgpt

Comments